Monitor Pixel Inversion: What It Is and How to Test It
Table of contents
Pixel inversion is what you see when the voltage pattern an LCD uses to protect itself becomes visible in the image. It shows up as faint scanlines, a fine mesh or checkerboard texture, or a slow crawl across flat colours. It is normal panel behaviour rather than damage, it varies between two units of the same model, and no setting in your monitor menu will remove it. Here is where it comes from, how to test for it, and what is worth trying.
Why LCDs flip polarity at all
An LCD pixel controls how much backlight passes through by twisting liquid crystal with an applied voltage. The amount of light depends on the size of that voltage, not its direction, so positive and negative work equally well.
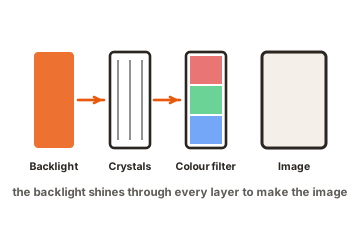
Direction still matters for a different reason. Leaving a steady voltage of one polarity across liquid crystal breaks the material down over time, in the same way a constant current pulls water apart into hydrogen and oxygen. To avoid that, panels alternate between positive and negative on every frame. This is polarity inversion, and every LCD does it.
In theory you would never notice. In practice, a pixel is very slightly brighter on one polarity than the other, so each one pulses at roughly half the refresh rate. Panels hide this by interleaving the two polarities across the screen, so the positives and negatives cancel out and the average stays flat.
OLED works differently. Its pixels emit light directly in response to current and need no polarity flipping, so this artifact does not apply. Lines or shimmer on an OLED come from somewhere else, most often brightness shifts at low frame rates with variable refresh rate running.
Where the artifact comes from
The interleaving is the whole trick, and it only works while the image on screen does not happen to line up with it.
Panel designers pick from four approaches: frame inversion, line inversion, column inversion and dot inversion. Dot inversion flips polarity on every neighbouring pixel in both directions, giving a checkerboard that reverses each frame, and it suppresses visible flicker best. It also needs more complex driver circuitry and more power, which is why cheaper panels often use line or column schemes instead. A peer-reviewed chapter on LCD driver IC design sets out how the four methods work at the driver level.
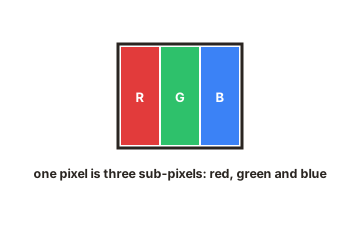
When the content you are displaying matches the panel’s polarity layout, the cancellation stops working. Every pixel that would have offset its neighbour now agrees with it, the small brightness difference stacks up instead of averaging out, and you see it. Fine repeating patterns are the worst case, which is exactly what a test image is built from.
What it looks like in real use
The test patterns produce obvious flicker. Ordinary content almost never does, which is why plenty of people own a monitor with measurable inversion behaviour and never notice a thing.
When it does appear, it takes a few forms:
- Scanlines. Faint horizontal or vertical lines across flat areas, often in darker scenes and often only while something is moving.
- Mesh or grid texture. A fine crosshatch over particular midtones and colours, sometimes with a slight colour tint to it.
- Pixel walk. A subtle pattern that drifts sideways across a plain colour at roughly 1.5 cm per second. It is easiest to catch from less than 15 cm away with one eye closed, following the drift.
Two details help you confirm what you are looking at. The effect is usually stronger toward the edges of the screen than in the middle, and it depends on exactly where a window sits, because moving it by a single pixel can shift the content out of alignment with the panel pattern.
How to test your monitor
The Lagom inversion test is the standard check. It puts eleven small patterns on screen, and on a well tuned panel none of them flickers.
Set up first, or the result means nothing. Run the monitor at its native resolution, set browser zoom to 100 percent, and make sure no GPU scaling is stretching the image. Any resampling changes the pattern at the pixel level and can create moire that has nothing to do with the panel.
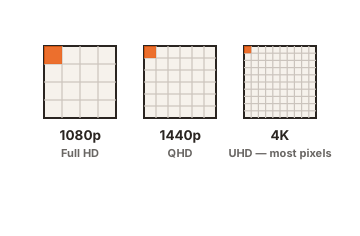
Several patterns come in a and b versions that differ by a single pixel of offset, so which one triggers depends on where your browser window sits. Drag the window around the screen and watch again, including near the edges. Most LCDs react to pattern 4a or 4b if they react at all.
There is a full-screen version of the test too. Skip it if you are sensitive to flicker, because it can be genuinely unpleasant on a panel that fails.
Strong flicker in the test means the drive voltages are not balanced well on your unit. Mild flicker in one pattern is common and rarely shows up in anything you actually use.
Telling it apart from other flicker
Several unrelated problems look similar at a glance, and the fix is different for each.
| What you see | Likely cause | How to check |
|---|---|---|
| Whole screen pulses, worse at low brightness | PWM backlight dimming | Raise brightness, or wave a pencil in front of the screen |
| Brightness jumps in dark scenes as frame rate swings | VRR flicker | Cap the frame rate or turn adaptive sync off |
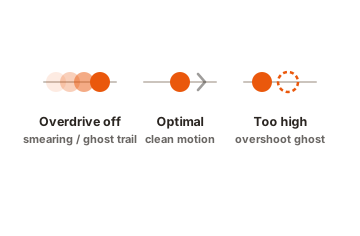
| Bright trails or halos behind moving objects | Overdrive overshoot | Lower the response time or overdrive setting |
| Blotchy patches on slow pans over grey | Dirty screen effect | Show a full-screen grey image with nothing moving |
| Fine lines or mesh tied to specific patterns and window position | Pixel inversion | Run the inversion test at native resolution |
What you can actually do
There is no user-facing control for this, because the setting lives in the panel’s drive voltages rather than the menu. That said, a few things are worth working through.
-
Fix the signal path
Native resolution, 100 percent scaling, no GPU-side stretching. This removes the causes that imitate inversion. -
Try other refresh rates
Some panels behave differently at 120Hz than at 144Hz or in an overclocked mode, because the drive timing changes with them. -
Watch it with and without VRR
If the lines only appear when frame rates swing at the low end, capping frames will help more than anything aimed at inversion. -
Swap the unit
Voltage tuning varies between individual panels, so another example of the same model may be clean. Some monitors also switch inversion patterns in firmware when they detect an unbalancing image, which is why two models with the same panel can behave differently. - Because this is a design behaviour rather than a fault, an exchange inside the retailer’s return window is a more reliable route than a warranty claim. That makes it worth testing a new monitor in the first week rather than the sixth month.
Because this is a design behaviour rather than a fault, an exchange inside the retailer’s return window is a more reliable route than a warranty claim. That makes it worth testing a new monitor in the first week rather than the sixth month.
Conclusion
Pixel inversion is the price LCDs pay for keeping their liquid crystal healthy, and on most panels the cancellation works well enough that you never see it. Test yours at native resolution with the inversion patterns, move the window around, and judge it on whether you can spot anything in real content rather than on the test alone. If it bothers you day to day, swap the unit early, because that is the only fix that reliably works.
For more, see our monitor troubleshooting guides.
Frequently asked questions
Is pixel inversion a defect?
Not in the warranty sense. Every LCD inverts polarity, and the artifact appears when the pattern becomes visible. Manufacturers treat it as normal panel behaviour, so an exchange usually goes through the retailer rather than a warranty claim.
Can pixel inversion damage my monitor?
No. Polarity inversion is what protects the panel. The artifact is a side effect of imperfect voltage balance, and it does not shorten the display's life or get worse over time.
Which panels show pixel inversion most?
High refresh TN panels and some VA panels are the usual candidates, because fast pixel response makes the voltage balance harder to hold. It varies from unit to unit, so panel type is a tendency rather than a rule.
Does pixel inversion cause eye strain?
It can bother people who are sensitive to flicker, since the pattern pulses at around half the refresh rate. If your eyes feel tired on one screen and fine on another, check PWM dimming as well, which is a more common cause.
Do OLED monitors have pixel inversion?
No. OLED pixels are driven with current and do not need alternating polarity. Faint lines on an OLED usually trace back to variable refresh rate brightness shifts or panel uniformity instead.