MSI MAG 321URX Color Settings: Monitor OSD and NVIDIA Setup
Table of contents
Set Pro Mode to sRGB in the monitor’s Professional menu, leave DSC switched on, and on the NVIDIA side run 3840 x 2160 at 240Hz with the output set to RGB, 10 bpc and Full dynamic range. Those four changes fix most color problems on this panel. The rest of this guide covers HDR, the Windows side, and the one setting that makes everything look oversaturated until you change it.
Which MSI monitor this covers
MSI’s 32 inch 4K QD-OLED sells under two names. The MPG 321URX and the MAG 321UPX use the same third generation Samsung QD-OLED panel at 3840 x 2160 and 240Hz, with identical color menus and the same OLED Care 2.0 protection. The MPG model adds 90W USB-C power delivery, two USB-A ports, a KVM switch and rear lighting. The MAG model drops those and gives 15W over USB-C. A third model, the MAG 321UP, runs the same panel at 165Hz. Every setting below works on all three. Full specs and firmware sit on MSI’s product page.
Color settings in the monitor menu
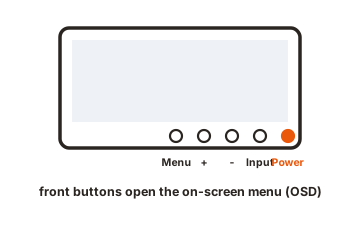
Press the joystick under the middle of the bottom bezel to open the on-screen menu. Color controls sit in two tabs, and only one of them holds accurate presets.
The Gaming tab has Game Mode, with options like Premium Color, FPS, Racing, RTS and RPG. These push saturation well past the source. The Professional tab has Pro Mode, and that is where the calibrated gamut presets live: Eco, User, Anti-Blue, Movie, Office, sRGB, Adobe RGB and Display P3.
Choosing sRGB, Adobe RGB or Display P3 greys out Color Temperature, Contrast and Low Blue Light, because each preset is a fixed calibrated state. To adjust white balance yourself, switch Pro Mode to User, set Color Temperature to Customization, and work with the R, G and B sliders. Panels tend to ship slightly warm at around 6000K to 6100K, and dropping R from 100 to about 98 pulls the white point closer to the 6500K target.
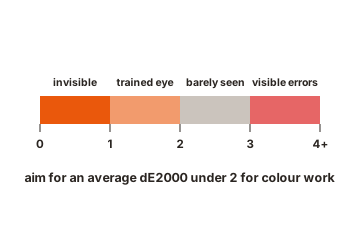
MSI calibrates each panel at the factory to a Delta E of 2 or lower, so the presets are a solid starting point and most people never need a colorimeter.
| Setting | Menu | What to use |
|---|---|---|
| Pro Mode | Professional | sRGB for desktop and web, Display P3 for games and video |
| Brightness | Image | To taste; lower is kinder to the panel |
| Color Temperature | Image | Normal, or Customization (User mode only) |
| Image Enhancement | Professional | Off |
| Night Vision, AI Vision | Gaming | Off |
| Adaptive-Sync | Gaming | On |
| DSC | Image | On |
| HDR | Image | True Black 400, or Peak 1000 nits |
The NVIDIA side, and where it moved
NVIDIA retired the classic Control Panel on 26 May 2026 with Game Ready driver 610.47. Display settings now live in the NVIDIA app under the System tab. An existing Control Panel install keeps working and the app is still on the Microsoft Store, but a clean driver install removes it.
Open System, pick Display, choose this monitor, and set:
- Resolution to 3840 x 2160 and refresh rate to 240Hz.
- Output color format to RGB.
- Output color depth to 10 bpc.
- Output dynamic range to Full.
In the classic Control Panel the same three color settings sit under Display, then Change resolution, once you select “Use NVIDIA color settings”.
RGB and Full matter most. A limited range signal crushes shadow detail and lifts blacks, which is easy to miss on an OLED until you look at a dark scene. 10 bpc gives you smoother gradients, which is worth having on a panel with this much contrast.
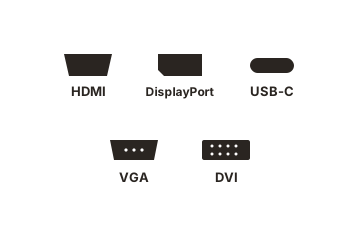
If 10 bpc is missing or 240Hz refuses to hold, check that DSC is on in the monitor menu. DisplayPort 1.4 does not have the bandwidth for 4K at 240Hz in 10-bit RGB without compression, so the monitor needs DSC enabled to offer that mode at all. Use the supplied DisplayPort cable or an HDMI 2.1 port, both of which carry the full signal.
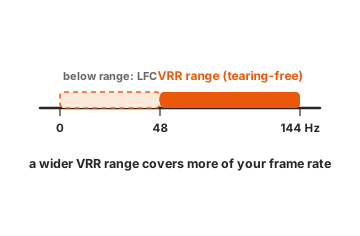
This monitor is validated as G-Sync Compatible, so turn G-Sync on in the app and Adaptive-Sync on in the monitor menu. Leave digital vibrance and RTX Dynamic Vibrance off if you want the color to stay honest.
Getting HDR right
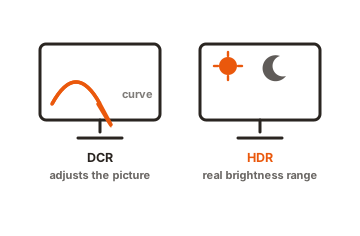
HDR needs two switches, one on each side. In the monitor, Image then HDR gives you DisplayHDR True Black 400 or Peak 1000 nits. True Black 400 holds brightness near 400 nits across the screen and stays accurate. Peak 1000 nits opens up small bright highlights and suits games and films in a dark room. In Windows, go to Settings, System, Display and turn on Use HDR.
Then install Windows HDR Calibration from the Microsoft Store and run it once. It writes a profile that tells games and Windows where this panel clips, which stops highlights from flattening out.
Leave the SDR picture presets alone while HDR is running. The monitor follows the HDR signal, so most image controls grey out. If the desktop looks dim or washed with HDR on, adjust the SDR content brightness slider under Settings, System, Display, HDR rather than the monitor’s brightness.
Why SDR looks oversaturated, and the two fixes
The panel covers around 99 percent of DCI-P3. Windows sends standard sRGB content straight through without converting it, so reds and greens land far stronger than the content intended. Skin tones go orange and website blues turn electric.
There are two ways to solve this, and you want one, not both.
The first is the monitor’s own sRGB preset under Pro Mode. It clamps the gamut in hardware, works on every input including a console, and needs nothing from the operating system.
The second is automatic color management in Windows 11, under Settings, System, Display, Color management, listed as “Automatically manage color for apps”. It arrived in version 24H2, needs an HDR-capable display, and maps SDR content to sRGB while leaving the wide gamut available to apps that ask for it.
Running both at once converts the image twice and leaves everything looking flat. Pick one. For games and video, Display P3 with automatic color management off gives the richer picture.
Check your work
The information bar at the top of the monitor menu shows the current resolution, refresh rate, picture mode, HDR state, Adaptive-Sync state and input. It should read 3840 x 2160 at 240Hz.
On the PC side, open Settings, System, Display, Advanced display. The active signal information there should show 10-bit color and your chosen refresh rate. If it says 8-bit, the change did not apply, so go back and confirm DSC and the output color depth setting.
Conclusion
Pro Mode set to sRGB, DSC on, and RGB with 10 bpc and Full range at 240Hz will get this monitor looking correct within a couple of minutes. Add HDR only when you want it, calibrate it once with the Windows tool, and pick a single gamut fix rather than stacking two. Done that way, the picture matches the source instead of exaggerating it, and the panel still gives you everything QD-OLED is good at.
For more, see our monitor specs guides.
Frequently asked questions
Is there an MSI MAG 321URX?
MSI's 32 inch 4K 240Hz QD-OLED comes as the MPG 321URX and the MAG 321UPX. Both share the same panel and the same picture menus, so any color guide for one applies to the other.
Should I use sRGB or Display P3 mode?
Use sRGB for desktop work, browsing and photo editing, where content is authored in sRGB. Use Display P3 for games, films and HDR-adjacent content that benefits from the wider gamut.
Why can't I select 10 bpc at 240Hz?
DSC is probably off in the monitor menu. DisplayPort 1.4 cannot carry 4K at 240Hz in 10-bit RGB uncompressed. Switch DSC on, then reselect the resolution and color depth on the NVIDIA side.
Where did the NVIDIA Control Panel go?
NVIDIA retired it in May 2026 with driver 610.47. Display and color settings moved to the NVIDIA app under the System tab. The old panel still runs if it is installed, and it remains on the Microsoft Store.
Do I need to calibrate this monitor?
Usually not. Each panel leaves the factory at a Delta E of 2 or lower, and the sRGB and Display P3 presets are accurate enough for most work. A colorimeter only pays off for paid color-critical jobs.