Ubuntu Touch Screen Monitor: How to Set One Up and Fix It
Table of contents
An Ubuntu touch screen monitor is any display with a touch layer that you run under the Ubuntu operating system. The good news is that most of them work the moment you plug them in. Ubuntu ships with the input drivers built in, so a single touch monitor is usually plug and play, no setup file, no vendor download.
The catch shows up later. As soon as you add a second screen, touch can start landing on the wrong monitor, and the way you fix that changed with recent Ubuntu versions. This guide walks through what these monitors are, what works out of the box, and how to fix touch when it goes sideways.
What is an Ubuntu touch screen monitor?
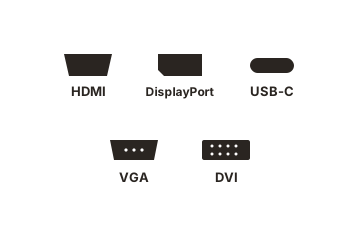
It’s a regular touch display, connected to a computer running Ubuntu, that lets you tap, swipe, and pinch instead of using a mouse. The monitor sends its picture over HDMI, DisplayPort, or USB-C, and it sends the touch signal over a separate USB cable (or the same USB-C cable, if it carries both).
The touch layer itself comes in a few types. Capacitive screens sense the electrical charge in your finger and feel like a phone. Resistive screens react to pressure and work with a gloved finger or stylus, which is why factories and older kiosks use them. Infrared screens use a grid of light beams across the surface.
Ubuntu is a free, open-source operating system based on Debian Linux. It’s popular for reviving old hardware and for kiosks, digital signage, and Raspberry Pi projects, all places where a touch screen makes sense.
People search for this term for two reasons: they want to buy a monitor that will work with Ubuntu, or they already have one and touch isn’t behaving. Both are covered below.
Does a touch monitor just work on Ubuntu?
Most of the time, yes, on a single screen. Ubuntu includes libinput, the modern input system that reads touch events straight from the Linux kernel. Plug in the video cable and the USB touch cable, and the screen usually responds right away with taps, two-finger scroll, and pinch to zoom.
You can confirm the system sees the touch device. Open a terminal and run this:
libinput list-devicesScroll through the list and look for your monitor’s name with a touch capability. If it’s there, the hardware is detected and the kernel is talking to it.
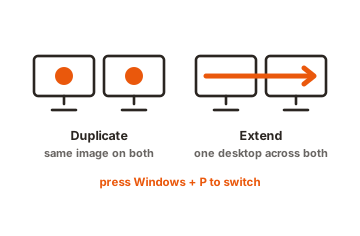
Trouble tends to appear in three situations: a very cheap or obscure panel with no kernel support, a small SPI display on a Raspberry Pi that needs a driver overlay, or, by far the most common, a two-monitor setup where touch is detected but pointed at the wrong screen. That last one is the heart of this guide.
Wayland vs Xorg: why it matters for touch
Before you fix anything, you need to know which display server Ubuntu is using, because the fix is completely different for each. A display server is the software that draws windows and routes input like touch and mouse clicks.
Ubuntu has two: the older Xorg (also called X11) and the newer Wayland. Wayland is now the default, and Ubuntu 25.10 dropped Xorg from the desktop entirely, so new installs run Wayland only. This matters a lot, because the classic touch-mapping command everyone used for years, xinput, only works on Xorg. On Wayland it does nothing useful.
Check which one you’re on with a single command:
echo $XDG_SESSION_TYPEIt prints either wayland or x11. Here’s how the two compare for touch work:
| Touch behaviour | Xorg (X11) | Wayland |
|---|---|---|
| Default in Ubuntu | Older releases, still selectable up to 25.04 | Yes, and only option from 25.10 |
| Map touch with xinput | Works | Does nothing |
| Multi-monitor touch | Manual, via xinput | Auto, but can pick the wrong screen |
| Fix when wrong | Run an xinput command | Set a udev rule, or use KDE's setting |
If you’re on X11 and everything works, you don’t have to switch. But since Ubuntu is moving to Wayland for good, it’s worth learning the Wayland method. The rest of this guide covers both.
How to set up a single touch monitor
For one screen, setup is short. Follow these steps and touch should work within a minute.
-
Connect the video cable
Plug HDMI, DisplayPort, or USB-C from the monitor into your computer. The picture should appear on its own. -
Connect the touch (USB) cable
Many touch monitors need a separate USB cable for the touch signal. If yours uses USB-C for both video and touch, one cable does it. -
Wait a few seconds
Ubuntu loads the driver automatically. Try tapping the screen. -
Confirm it's detected
Run libinput list-devices in a terminal and find your monitor in the list. -
Test the gestures
Tap to click, drag to move, and try two-finger scroll in a browser.
If the pointer follows your finger correctly, you’re done. If touch works but feels slightly off, or lands in the wrong place, skip ahead to calibration. If touch lands on your other screen, that’s the multi-monitor problem, covered next.
How to fix touch on a second monitor
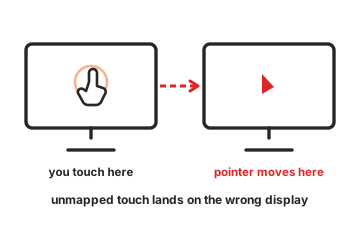
This is the number one reason people search for help. You have two screens, both display fine, but when you touch the touch monitor, the pointer jumps to the other one. The cause is simple: the system knows a touch happened, but it hasn’t been told which display that touch belongs to. The fix depends on your display server.
On Xorg (X11): use xinput
If echo $XDG_SESSION_TYPE returned x11, you can map touch to a specific screen with two commands. First, find your touch device name:
xinput listLook for your touch panel in the list (the name comes from the manufacturer, for example a Gechic screen shows up with ILITEK in the name). Then find your monitor’s output name:
xrandrConnected outputs look like HDMI-1 or DP-2. Your laptop’s built-in screen is usually eDP. Now map the touch device to the correct output, using your real names:
xinput map-to-output "ILITEK ILITEK-TP" HDMI-1Touch should now hit the right screen. One catch: this resets every time you reboot or replug the USB cable. To make it stick, save the command in a small autostart script that runs at login.
On Wayland: udev or a desktop setting
On Wayland, GNOME (Ubuntu’s default desktop) tries to map touch to the right screen for you by matching the panel to a display. When it works, you do nothing. When it picks the wrong screen, xinput won’t help, because Wayland hides the real device from it.
The reliable fix is a udev rule that tells the system which output the panel belongs to. First get the panel’s vendor and product IDs:
libinput list-devicesThen create a rule file at /etc/udev/rules.d/99-touch.rules that ties those IDs to the correct output name. This is the method the Wayland input system, libinput, is built to use, and it survives reboots. The full syntax lives in the libinput device-configuration docs, which are worth keeping open while you write the rule.
For the exact field names and matching options, see the libinput udev configuration reference.
If you rely on a two-screen touch setup and can’t get Wayland to behave, the practical fallback (on Ubuntu versions that still offer it) is to log in to an Xorg session and use the xinput method above. Click the gear icon on the login screen and choose “Ubuntu on Xorg” before signing in.
How to calibrate touch on Ubuntu
Calibration fixes the small stuff: the pointer appears a bit above or beside your finger, or the axes feel flipped so moving right sends the cursor left. Modern capacitive screens rarely need it. Older resistive panels and some industrial screens often do.
On Xorg, the old tool was xinput_calibrator, but that project is no longer maintained and only handles single-screen setups. The better path today is to set a calibration matrix directly.
A calibration matrix is a set of nine numbers that tells the system how to stretch, shift, or flip the touch area so it lines up with the picture. To flip a screen that reads touches backward on both axes, you’d apply a matrix through libinput. On Xorg you can test one live:
xinput set-prop "Your Device" "Coordinate Transformation Matrix" -1 0 1 0 -1 1 0 0 1On Wayland, you set the same idea as LIBINPUT_CALIBRATION_MATRIX inside the udev rule you made earlier, so it loads at boot. Getting the exact numbers takes a little trial and error, and a calibration tool that supports libinput can work them out for you by having you tap targets on the screen.
Choosing a touch monitor that works with Ubuntu
If you’re still shopping, a few things make Ubuntu life easier. The aim is a panel the Linux kernel already understands, so you avoid hunting for drivers that may not exist.
- Prefer USB touch over serial. A USB touch interface is detected automatically. Old serial (RS-232) touch panels are far harder to set up.
- Look for a standard touch controller. Panels using common capacitive controllers tend to work without any driver. Very obscure controllers may have no Linux support at all.
- Check for any Linux mention. Sellers who list Ubuntu, Raspberry Pi, or Kali support are signaling the panel has been tested on Linux.
- For a Raspberry Pi, match the board. Small SPI displays for the Pi often need a specific driver overlay, so buy one with clear Pi and Ubuntu instructions.
- Capacitive for daily use, resistive for gloves or grime. Capacitive feels smoother; resistive suits workshops, kitchens, and cold rooms.
For an industrial or kiosk build, vendors who publish Linux setup notes save real time. Hope Industrial Systems, for instance, documents how their USB touch screens run on Ubuntu with the built-in driver, which is the kind of confirmation worth looking for before you buy.
You can read one such write-up on the Hope Industrial touch screen and Ubuntu guide.
Conclusion
A single touch monitor on Ubuntu is close to effortless: plug in video and USB touch, and it works. The setup only gets tricky with two screens, where touch can land on the wrong display, and the fix depends on whether you’re running Xorg (use xinput) or Wayland (use a udev rule, or switch to KDE for a simple dropdown). Check your display server first, map touch to the right screen, then calibrate. Do those in order and you’ll have a touch monitor that behaves.
For more on wiring up extra screens, browse our monitor setup guides.
Frequently asked questions
Why does touch go to the wrong screen on my dual monitor setup?
The system detects the touch but hasn't been told which display it belongs to. On Xorg, map it with xinput map-to-output. On Wayland, set a udev rule or use KDE's touchscreen setting to bind touch to the correct monitor.
Does xinput work on Ubuntu with Wayland?
No. xinput only controls touch on Xorg (X11). On Wayland it can't reach the real device, so mapping and calibration commands do nothing. Use a udev rule with libinput instead, or log in to an Xorg session.
How do I know if I'm running Wayland or Xorg?
Open a terminal and run echo $XDG_SESSION_TYPE. It prints wayland or x11. From Ubuntu 25.10 onward, desktop installs run Wayland only, so Xorg won't be an option.
Do touch screens need drivers on Ubuntu?
Usually not. Ubuntu includes libinput, which reads touch input straight from the kernel, so most USB touch monitors work when plugged in. Rare or very cheap panels, and some Raspberry Pi displays, may need extra configuration.
Can I use a touch monitor with a Raspberry Pi running Ubuntu?
Yes. Standard HDMI or USB-C touch monitors work like on any computer. Small SPI displays made for the Pi often need a driver overlay, so pick one with clear Ubuntu or Raspberry Pi setup instructions.